 ultimate-guide
9 Best Weatherstripping Options for Arizona Exterior Doors
Last Updated: November 3, 2026
Quick Summary
The best exterior door weatherstripping for Arizona is UV-stable silicone bulb or solid EPDM rubber, since these stay flexible in intense sun and resist monsoon rain and dust. Cheap adhesive foam breaks down quickly in the desert heat and should be treated as a temporary fix.
- Silicone bulb seals stay flexible under UV and handle dust and wind-driven rain well.
- Adhesive foam degrades in direct sun and is a short-term fix on exterior doors.
- Measure gaps about 1/8 inch wide at the top and sides before buying seal thickness.
- Buy about 10 percent extra material to cover corner trimming and mistakes.
- Add a door sweep to the bottom, since it is often the largest source of drafts.
Table of Contents
- Types of Exterior Door Weatherstripping at a Glance
- How to Choose Weatherstripping for a Specific Door
- How to Seal a Drafty Exterior Door Step by Step
- Door Sweep Installation and Sealing the Bottom of the Door
- Replacing Worn Weatherstripping and Troubleshooting Common Problems
- Booking Your Weatherstripping Upgrade with Arizona Door Store
- Frequently Asked Questions
Choosing the best weatherstripping for exterior doors in Arizona starts with understanding how the desert climate works against standard seals.
Heat is the first challenge. For guidance on sealing a door against dust and heat specifically, see sealing a door against dust and heat.
Monsoon weather adds a different test.
Here is how the main seal types compare in Arizona conditions:
| Seal Type | Heat and UV Performance | Monsoon Rain and Dust | Typical Lifespan |
|---|---|---|---|
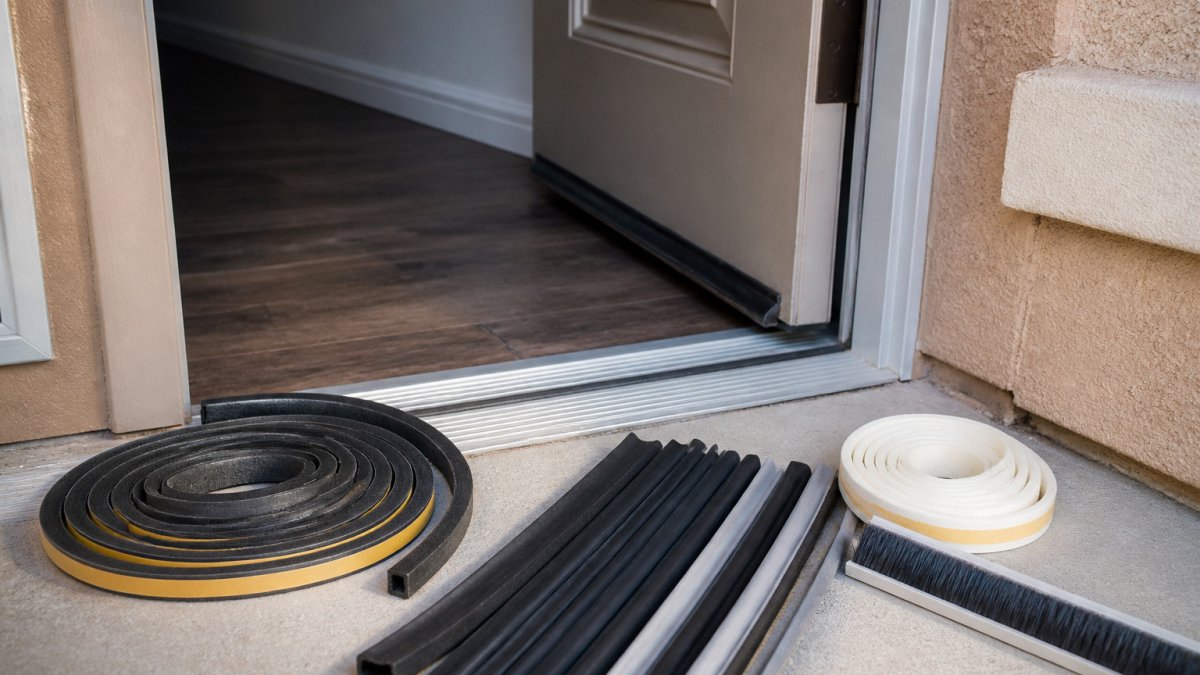
| Silicone bulb (kerf-in) | Stays flexible, UV resistant | Strong seal against dust and wind-driven rain | Long, often years |
| Solid rubber | Good heat tolerance | Solid, dust-resistant | Moderate to long |
| Adhesive foam | Degrades in direct sun | Weak against wind-driven dust | Short |
| Brush seal | Durable, handles wear | Lets fine dust through | Moderate |
Start by looking at which side of your home takes the most sun and storm exposure, since that determines how aggressive your seal needs to be.
Types of Exterior Door Weatherstripping at a Glance
Exterior door weatherstripping falls into a few broad families, and each one behaves differently under Arizona conditions. Knowing the categories helps you narrow the field before you measure anything.
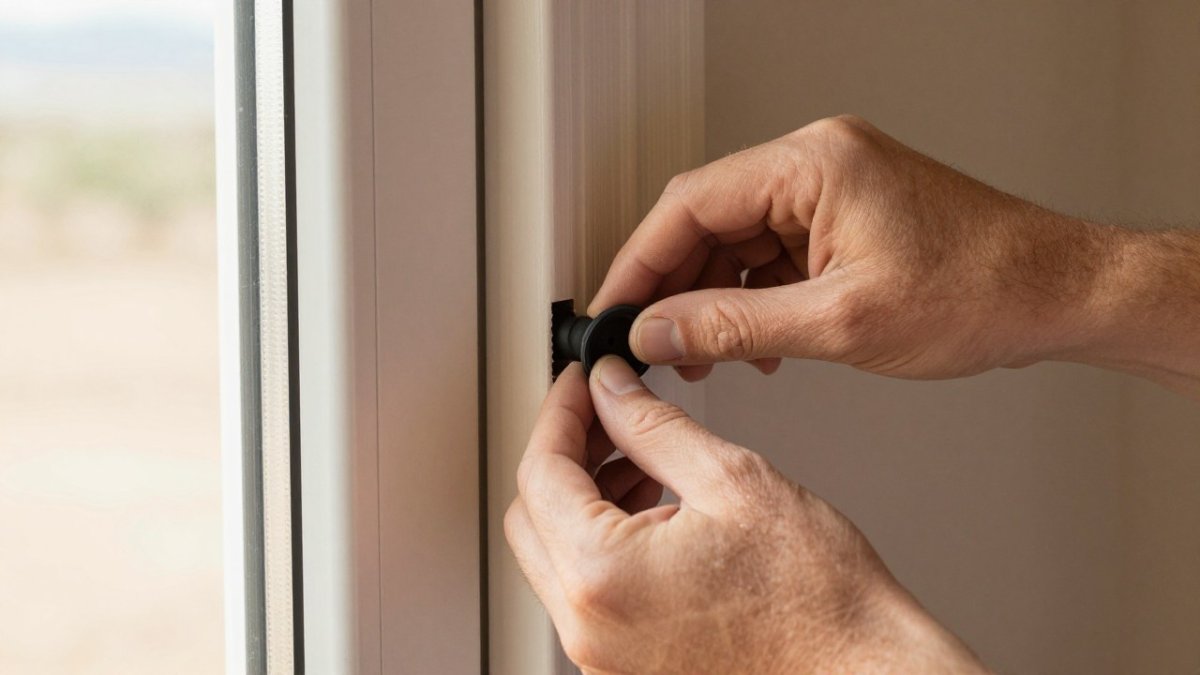
Most exterior seals fall into compression seals, which press against the door when closed, and kerf-in seals, which sit in a groove cut into the frame.
The homeowner is American.
Compression and Kerf-In Seals
Compression seals, often called V-strip or tubular seals, compress against the frame to block air and water. They are easy to install with adhesive backing but tend to wear out faster in direct sun. Kerf-in bulb seals fit into a pre-cut groove, which holds them securely without adhesive and generally lasts longer on exterior doors. The tradeoff is that kerf-in seals require a frame that already has the slot, or a professional to cut one.
Vinyl, Rubber, Silicone and Foam Compared
Material choice matters more in Arizona than in mild climates. EPDM rubber also performs well outdoors and handles temperature swings. Vinyl is affordable but can stiffen or crack over time in intense sun. Foam is the cheapest option and the easiest to cut, but it breaks down quickly under heat and should be treated as a temporary fix on exterior doors.
How to Choose Weatherstripping for a Specific Door
The best seal depends on your door, not just your climate. Start by identifying what kind of exterior door you have, how the frame is built, and where the gaps appear. Then measure those gaps instead of eyeballing them, because seal thickness and profile are the two choices that decide whether the door latches smoothly or fights you every time you close it.
Diagnose the gap before you shop
Check the door in daylight with the door closed. At night, have someone hold a flashlight outside the frame while you look for light coming through. Mark each gap on the top, sides, and bottom with painter's tape. Once the door gaps are marked, distinguish them from cracks where the frame meets the exterior siding, since those joints call for sealant for siding joints rather than weatherstripping.
Measure the gap and match the seal thickness
Use a set of feeler gauges or a folded piece of paper to measure the gap at its widest point along each edge. A common pattern is a gap of about 1/8 inch at the top and sides, which suits a bulb or V-strip seal in the 3/16 to 1/4 inch range.
Watch out: buying a seal that is too thick for the gap is the most common cause of a door that will not latch after installation, and forcing the latch wears the strike plate and hinges.
Match the profile to the frame and door movement
- Exposure: Doors facing west or south get the most sun and need UV-stable silicone or EPDM.
- Frame type: A pre-cut kerf slot allows a bulb seal. A flat frame usually needs adhesive-backed compression strip or a surface-mounted bulb.
- Door movement: Heavier doors and doors that swell in monsoon humidity need a seal with more give, such as a hollow bulb rather than a solid rubber strip.
- Gap size: Narrow gaps suit thin V-strip. Wider gaps may need a thicker bulb or a combination of seals.
- Latch and strike: After installation, the door should close with light pressure and the latch should engage without lifting or shoving. If it takes two hands, the seal is too thick.
Buy the right quantity and check the fit before you commit
Measure the door opening, then buy enough material to cover the top and both sides, plus the bottom if you are adding a sweep. Add about 10 percent for corner trimming and mistakes. Cut the seal slightly long and trim after installation for a snug fit.
The homeowner is American.
How to Seal a Drafty Exterior Door Step by Step
Once you have the right material, the installation process is straightforward. For a detailed walkthrough of fitting the seal itself, see step-by-step installation guide. Working on a dry, mild day gives adhesive the best chance to bond, and a clean surface makes a large difference.
- Clean the frame. Wipe the door jamb and stop with rubbing alcohol to remove dust, oil, and old adhesive residue.
- Dry-fit the seal. Press it into position without peeling the backing and trim to length at the corners.
- Apply the seal. Peel the backing and press firmly along the jamb, starting at the top and working down. For kerf-in seals, push the bulb into the groove with a flat tool.
- Check the closing action. Close the door and confirm the seal compresses evenly without making the door hard to latch.
- Test for leaks. Repeat the flashlight check at night. Any remaining light shows a gap that needs adjustment.
Door Sweep Installation and Sealing the Bottom of the Door
The bottom of an exterior door is often the largest source of drafts, dust, and water, and it is frequently overlooked.
Sweeps mount to the interior face of the door near the bottom edge. The rubber or vinyl blade should brush the threshold without dragging hard enough to make the door difficult to open.
If your threshold is worn or uneven, a threshold seal may work better than a sweep alone.
Replacing Worn Weatherstripping and Troubleshooting Common Problems
Weatherstripping does not last forever, especially on exterior doors that face desert sun. Replace it when you see cracking, flattening, peeling adhesive, or new light and dust entering the house. If the door itself is sticking or gapping in the heat, check whether warping is the underlying cause. The trick is knowing which failures are normal wear and which point to a door problem that a new seal will not fix.
Expected lifespan by material
Lifespan depends on exposure and material. Inspect seals before the monsoon and again after the summer heat peaks, since sun exposure strongly affects how long any seal lasts.
Inspect on a schedule
A quick seasonal check takes about ten minutes per door. Run a hand along the seal with the door closed and feel for drafts, look for cracks or flattened spots, and repeat the flashlight test at night. Wipe seals clean with a damp cloth and mild soap; avoid solvents that dry out rubber and silicone. If a seal is still flexible and compresses evenly, it does not need replacing just because it is a few years old.
Troubleshoot the common failures
- Adhesive peeling away: The surface was dirty, damp, or too hot when the seal went on. Remove the strip, clean the jamb with rubbing alcohol, let it dry fully, and apply new adhesive-backed seal on a mild day. Adhesive rarely re-bonds well once it has failed.
- Door sticks after installation: The seal is too thick for the gap. Trim the profile, switch to a thinner bulb, or adjust the strike plate rather than forcing the latch.
- Sweep drags on the threshold: Raise the sweep slightly or replace a worn threshold. A sweep should brush the surface, not scrape it.
- Corners leak: Corners are where most seals fail first. Cut the seal at a slight angle or use a corner piece so the two runs meet without a gap, and press the corner down firmly.
- Door still gaps after new seals: The problem may be the door itself. Frames can shift and doors can warp in extreme heat, which changes the fit and undermines even high-quality weatherstripping. Check the door for square and the frame for movement before buying more seal.
Watch out: if a door has warped or the frame has shifted, new weatherstripping will close the visible gap for a season but will not fix the underlying alignment problem.
Cost and when to hire a professional
Professional replacement can make sense when the door is out of square, the threshold is damaged, or the draft persists after you have already replaced the seals once. Pricing depends on the products you choose and the work involved, so ask for a quote that separates materials from labor.
Keep a routine check on seals each season, especially before monsoon and after summer heat peaks. Wiping seals clean and checking for cracks is quick and extends their life.
Booking Your Weatherstripping Upgrade with Arizona Door Store
If you are not sure which seal fits your door, or whether drafts point to a seal problem or a door problem, the team at Arizona Door Store can help you sort it out. We carry a range of door hardware and can talk through material choices for your exposure and budget. Pricing depends on the products you choose and the quantity you need, so contact us or visit our website for a current quote.
Frequently Asked Questions
What is the best type of weatherstripping for an exterior door in Arizona?
For most Arizona exterior doors, silicone or high-grade EPDM rubber performs best because it stays flexible under intense sun and heat. Compression seals and kerf-in bulb seals give the most reliable fit against wind-driven monsoon rain and dust. Foam tape works only as a short-term fix on low-exposure doors. Measure the gap first, then match the profile to the door type and frame condition.
Is silicone weatherstripping better than rubber?
Rubber remains a solid, lower-cost option for shaded doors or moderate gaps, but it can dry out after several summers of direct sun. Silicone typically costs more up front than rubber. Choose based on sun exposure: south- and west-facing doors benefit most from silicone.
How do I know if my door weatherstripping needs to be replaced?
Replace weatherstripping when you can see daylight around the door, feel air movement on a windy day, or notice dust collecting along the threshold. Cracked, flattened, torn or crumbling seals have lost their compression and no longer block air. A quick test is to close the door on a dollar bill: if it slides out easily at any point, the seal needs attention. Check seals after every monsoon season, since wind-driven rain and dust accelerate wear.
How do I seal the bottom of an exterior door?
Install a door sweep or a threshold with a flexible vinyl or rubber seal on the inside face of the door, so the seal contacts the threshold when closed. Measure the door width and cut the sweep to length with a hacksaw or sharp snips. Fasten it with screws rather than adhesive if the door is heavily used. Adjust the door so it closes with light, even pressure. Avoid overtightening, which can cause the door to bind in the frame during Arizona's temperature swings.
Stay tuned for our next guide on keeping your exterior doors sealed through Arizona's changing seasons.