 how-to
How to Finish Wood Doors for Lasting Durability
Table of Contents
- Why Wood Door Durability Starts With the Finish
- How to Sand a Wood Door Before Staining
- Polyurethane vs Spar Varnish for Doors
- Best Exterior Wood Door Finish for Sun Exposure
- Step-by-Step: Applying Stain and Topcoat to Wood Doors
- Common Finish Failures and How to Fix Them
- Maintenance and Re-Coating Schedules for Wood Doors
- Conclusion
- Frequently Asked Questions
Last Updated: September 12, 2026
Why Wood Door Durability Starts With the Finish
A wood door's lifespan is decided long before the hardware goes on. The finish is its only defense against sun, moisture, and temperature swings, and in the Southwest those forces work on wood daily. This guide from Arizona Door Store walks through how to finish wood doors for durability, from sanding grits to re-coating schedules.
Wood door finishing is sealing and protecting a wood substrate with stains, conditioners, and topcoats so the door resists moisture, UV damage, and wear. Get it right and a solid wood door serves for decades; get it wrong and you'll see cracking, peeling, and gray, sun-bleached grain within a couple of seasons.
The stakes are higher than most homeowners expect. Exterior doors on south- and west-facing walls see surface temperatures climb well above ambient air, and a film-forming finish like polyurethane or spar varnish takes that punishment directly (weather.gov). Once the film fails, water finds the end grain, which soaks up moisture faster than any other part of the door.
Interior doors live an easier life, but a quality topcoat still means they wipe clean instead of absorbing hand oils and grime.
Below, we'll cover the full sequence: sanding, conditioning, choosing between polyurethane and spar varnish, handling sun exposure, applying stain and topcoat, fixing failures, and knowing when to re-coat. The order matters as much as the products.
How to Sand a Wood Door Before Staining
Sanding is where most finish jobs are won or lost. The goal is a flat, scratch-free surface that accepts stain evenly, which takes a sequence of grits rather than one aggressive pass.
Start with 120-grit on bare wood to remove mill marks and old finish residue. Move to 150-grit, then finish at 180-grit for stain-ready wood. Going finer than 220-grit can burnish the surface and actually block stain penetration.
A random-orbit sander handles flat panels efficiently; for profiles, edges, and raised panels, switch to a sanding block or sponge in the same grit. Always sand with the grain, or you'll leave cross-grain scratches that stain will highlight.
Between grits, wipe the surface with a tack cloth. Sanding dust left in the pores shows up as cloudy patches under stain.
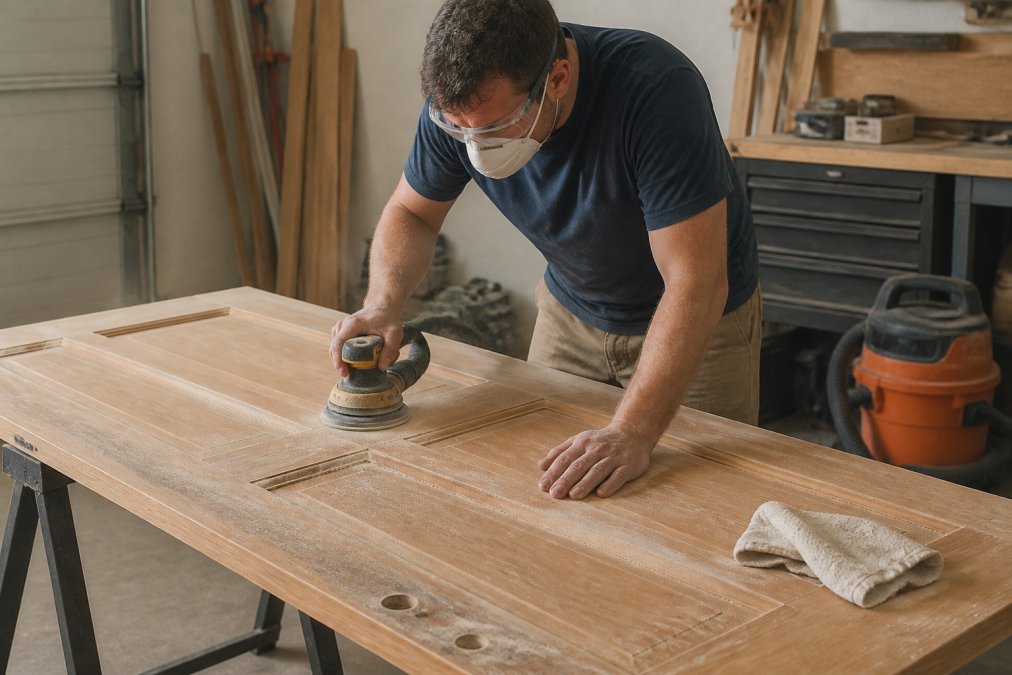
One more step that's easy to skip: raise the grain before final sanding. Wipe the door with a damp cloth, let it dry, then sand lightly at 180-grit. This lifts crushed fibers so they don't stand up after the first coat of stain or sealer, skipping it is why some doors feel rough after the first coat.
Polyurethane vs Spar Varnish for Doors
Polyurethane and spar varnish are both film-forming finishes, but they're built for different exposures. Polyurethane is a durable, scuff-resistant topcoat best suited to interior doors and protected entries. Spar varnish is softer and more flexible, formulated with UV inhibitors for exterior use.
The trade-off is hardness versus flexibility. Polyurethane cures hard and resists abrasion well, which is why it's standard for interior trim, cabinets, and furniture, but that hardness makes it brittle under constant sun and temperature cycling, so exterior polyurethane cracks and peels sooner.
Spar varnish stays slightly flexible, moving with the wood as it expands and contracts through the seasons, and carries UV protection that slows sun graying. The cost is a softer film that scuffs more easily and cures slower.
| Finish | Best For | Durability Rating | Key Weakness |
|---|---|---|---|
| Water-based polyurethane | Interior doors, low-odor projects | High scuff resistance indoors | Poor UV and weather resistance |
| Oil-based polyurethane | Interior doors, high-traffic trim | Very high scuff resistance | Brittle under exterior sun exposure |
| Spar varnish | Exterior doors, full sun | Excellent UV and moisture resistance | Softer film, longer cure time |
Water-based polyurethane dries fast and cleans up with soap and water, making it practical for interior work. Oil-based versions amber slightly over time. Spar varnish sits at the exterior end of the spectrum, and that's where it belongs.
Best Exterior Wood Door Finish for Sun Exposure
For doors that take direct sun, a flexible exterior varnish built with UV inhibitors is the best exterior wood door finish for sun exposure. It handles the ultraviolet light, heat, and moisture cycling that destroys less flexible coatings, but the product name matters less than how the finish system is built and how it matches your exposure.
What UV inhibitors actually do
Sunlight breaks down lignin in wood cell walls, which is why unprotected exterior wood turns silver-gray and fuzzy. UV inhibitors absorb ultraviolet energy and convert it to heat before it reaches the wood, slowing that breakdown. The catch: UV inhibitors are consumed over time, so a finish that has lost its UV package still looks intact but no longer protects the wood, which is why re-coating on schedule matters more than buying the most expensive product once.
Pigment also blocks UV: a stained or tinted exterior finish shields wood far better than a clear coat because pigment particles absorb and scatter light. For maximum longevity on a sun-blasted door, a lightly tinted exterior stain outperforms a clear film every time, the trade-off is committing to a color.
Match the finish to the exposure, not just the label
Exposure is not one thing. A door under a deep porch overhang sees a fraction of the UV load of a door on an unshaded south or west wall, and the finish schedule should reflect that:
- Full sun, no overhang: flexible exterior varnish or exterior stain with UV inhibitors, built in multiple thin coats, re-coated on the short end of the manufacturer's interval.
- Partial shade or overhang: the same finish family works, but you can stretch the re-coat interval and may get away with a clear film if the wood is a naturally durable species.
- Coastal or high-humidity exposure: prioritize moisture resistance alongside UV; salt air and constant humidity stress the film from both sides.
- Arid, high-altitude exposure: intense UV and wide day-night temperature swings are the enemy. Flexibility and UV load matter more than moisture resistance, and film thickness should be built slowly because fast-drying conditions can trap solvent.
Film build: thin coats, more of them
A single heavy coat is the most common exterior mistake. Thick films cure unevenly, trap solvent, and crack along the grain as the wood moves. Three to four thin coats, each sanded lightly between applications, outlast two thick ones by a wide margin: a thin film flexes with the wood's seasonal movement, while a thick film fights it and loses.
For maximum protection on a fully exposed door, some finishers apply a penetrating oil first, let it cure, then build film coats on top. The oil layer moves with the wood and gives the film something to bond to besides bare, dry fiber.
End grain and edges are where finishes fail first
End grain soaks up moisture faster than face grain because the cut fibers act like a bundle of straws. The top and bottom edges and any mortised hardware cutouts are entry points for water that eventually lifts the film. Seal every exposed end grain with two or three extra coats before the door is hung, this does more for exterior durability than upgrading the topcoat brand.
You can check the manufacturer's guidance for exterior wood care through the American Wood Protection Association, which publishes standards for wood protection and treatment.
Step-by-Step: Applying Stain and Topcoat to Wood Doors
Application technique decides whether the finish looks professional or patchy. Work in a dust-free space with the door laid flat, and follow this sequence:
- Apply pre-stain wood conditioner. On softwoods like pine or alder, a pre-stain conditioner evens out absorption so stain doesn't turn blotchy. Wipe it on, let it sit per the label, then wipe off the excess.
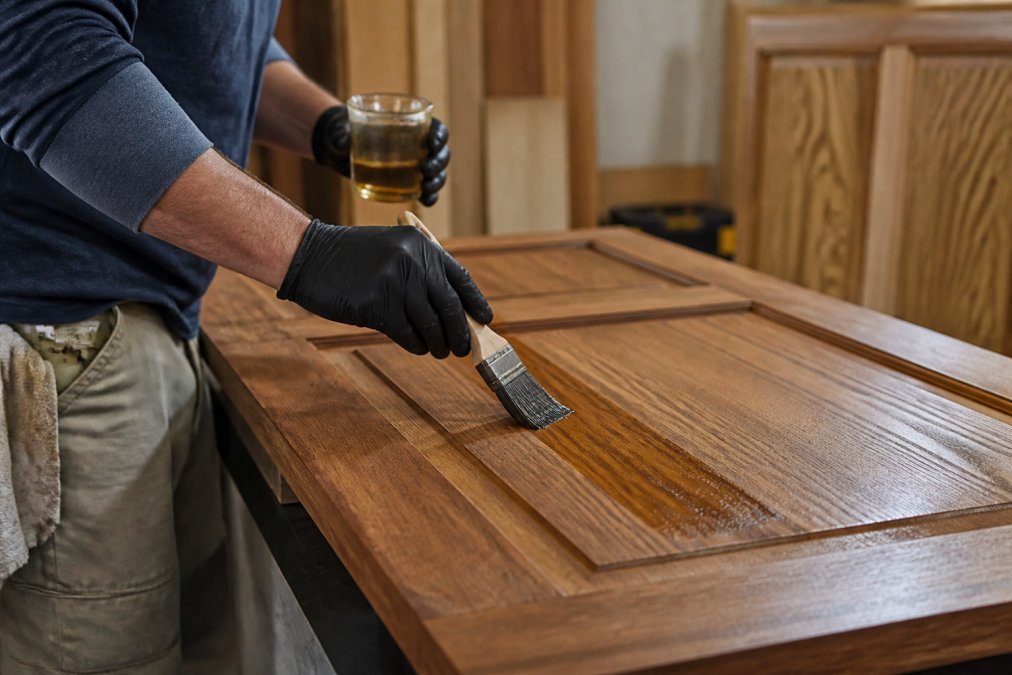
- Stain the door. Work in small sections, wiping with the grain and removing excess before it dries. On a raised-panel door, do the profiles first, then the flat panels.
- Let the stain cure fully. Rushing this step traps solvent under the topcoat and causes cloudiness or poor adhesion.
- Seal with a sanding sealer. A thin sealer coat locks in the stain and gives the topcoat a uniform surface to bond to.
- Sand lightly between coats. Use 220-grit or finer with a light hand, just enough to knock down dust nibs. Wipe with a tack cloth.
- Build thin topcoats. Apply two to three thin coats of spar varnish or polyurethane, following the label's recoat window. Thin coats cure harder and last longer than thick ones.
- Let the final coat cure completely. Curing time is longer than dry time, often several days for oil-based products. Don't hang the door until it's fully cured.
A common mistake is applying topcoat in a humid garage or on a cool morning. Moisture and low temperatures slow curing and can leave a hazy film. Aim for a dry, moderate day with good ventilation.
Common Finish Failures and How to Fix Them
Most finish failures trace back to prep or product choice, and each has a specific fix.
Cracking and peeling usually means a rigid film was used outdoors. Strip the failed finish, sand back to bare wood, and rebuild with spar varnish.
Blotchy stain comes from uneven absorption on softwoods. The fix is a pre-stain conditioner, applied before any stain goes on.
Cloudy or hazy topcoat points to moisture trapped under the film, often from high humidity during application. Let the door dry fully, then sand and re-coat in drier conditions.
Rough, raised grain after the first coat means the grain wasn't raised and sanded before finishing. Lightly sand the dried coat, wipe with a tack cloth, and continue.
Gray, weathered wood on exterior doors signals UV breakdown, which means the finish has failed and the wood is exposed. This requires sanding back to fresh wood before refinishing.
The U.S. Environmental Protection Agency's guidance on volatile organic compounds is worth reviewing if you're choosing between solvent-based and water-based products, since VOC content affects both indoor air quality and how you should ventilate your workspace.
Maintenance and Re-Coating Schedules for Wood Doors
Re-coating on schedule costs far less than refinishing after failure, but the interval shifts with climate, orientation, and finish type. Here is a framework you can actually apply.
Start with a climate-adjusted baseline
Use these as starting points, then shorten the interval for harsher exposure and lengthen it for milder conditions:
- Exterior doors in full sun, arid or high-UV climate: inspect every six months, re-coat every one to two years.
- Exterior doors in full sun, humid or coastal climate: inspect every six months, re-coat every one to two years, and watch for mildew and film lifting at the bottom edge.
- Exterior doors under a porch or overhang: re-coat every two to three years.
- Interior doors: re-coat only when the surface dulls or shows wear, often every five years or more.
- High-traffic interior doors: check annually around handles and push points, where scuff resistance wears first.
The single biggest variable is orientation: a west-facing door in full afternoon sun can need re-coating twice as often as an identical door on a shaded north wall. If one door always fails first, orientation is usually why.
The water-bead test is your early warning
Forget waiting for visible cracks. Put a few drops of water on the surface: if it beads up and rolls off, the finish is intact; if it spreads and soaks in, the protective layer is losing water resistance and it's time to re-coat, even if the door still looks fine. This thirty-second test catches failure months before it becomes visible.
Also check the bottom edge and any end grain, the top edge under the overhang, and around hardware. These are the first places water gets in, and they fail before the face does.
Maintenance coat vs. full refinish
Not every problem needs a strip-and-rebuild. Match the response to the condition:
- Finish intact, water still beads, surface dull: clean, scuff with 220-grit, wipe with a tack cloth, and apply one thin maintenance coat of the same product. This is the cheapest and most common fix.
- Finish intact but water no longer beads: scuff and apply one or two thin coats. Do not strip a film that is still bonded.
- Hairline cracks, flaking, or peeling: the film has failed. Sand back to bare wood in the affected areas, feather the edges, and rebuild the finish system. Spot-repairing over a failed film traps moisture and makes it worse.
- Gray, weathered wood showing through: the finish is gone and the wood is exposed. This requires sanding back to fresh wood before refinishing, because a new coat will not bond to weathered fiber.
Keep a finish log
Write the product name, sheen, batch or date, and application date on the can or in a note. Matching a finish years later is nearly impossible without it, and having the original product on hand turns a full refinish into a quick touch-up. Note product changes too, some finishes won't bond over others, and the log is the only way to know what's actually on the door.
Conclusion
Finishing a wood door for durability comes down to preparation, the right topcoat for the exposure, and staying ahead of the re-coat schedule. Skip any of the three and you'll be stripping the door instead of maintaining it.
Arizona Door Store supplies interior and exterior doors, moulding, and hardware for projects across Scottsdale, Phoenix, and Tucson, with locally made doors, fast will-call service, and reliable delivery to keep your timeline on track. If you'd rather start with a door that's built to take a finish, or you want guidance on which product suits your exposure, our team can help you match the door and the finish to the job.
Frequently Asked Questions
What is the average lifespan of a wooden door?
A solid wood door that is properly finished and maintained can last 30 to 50 years or more. The finish is the deciding factor. An exterior door with a failing topcoat will absorb moisture, crack, and warp within a few seasons, while a door re-coated on schedule can outlast the hardware. Interior doors face less weather stress and often last longer with minimal upkeep. The wood species matters too: hardwoods like oak resist dents better, while softwoods need a thicker film-forming finish to hold up.
Is it better to paint or stain an exterior wood door?
It depends on the look you want and how much maintenance you will accept. Paint hides grain and covers imperfections, and a quality exterior enamel paint offers strong UV protection. Stain shows the natural grain and pairs well with a clear topcoat, but it needs re-coating more often, especially in high-sun areas. Many homeowners in the Phoenix metro choose stain for entry doors to keep the wood look, then protect it with a marine-grade or spar varnish that blocks UV. Either way, surface preparation and the right primer or pre-stain conditioner determine how long the finish lasts.
How many coats of finish should I apply to a wood door?
Plan on at least three coats of topcoat for exterior doors and two to three for interior doors. The first coat seals the wood grain, the second builds film thickness, and the third provides the wear layer that takes scuffs and sun exposure. Lightly sand between coats with 220-grit sandpaper and wipe with a tack cloth to remove dust. More coats add protection but also curing time, so follow the manufacturer's recoat window. A door that gets direct afternoon sun benefits from an extra coat on the exposed face and edges.
Should I wax or varnish my wooden doors?
Varnish is the better choice for durability. A film-forming finish like polyurethane or spar varnish builds a protective layer that resists moisture, UV, and scuffs. Wax sits on the surface and offers little moisture resistance; it also makes future re-coating harder because it must be fully stripped first. If you want a low-sheen natural look on an interior door, a penetrating oil followed by a thin topcoat works. For exterior doors exposed to sun and rain, stick with varnish or a marine-grade topcoat and skip the wax.
When a finish fails, the door is usually the first thing blamed, but the real cause is almost always prep or product mismatch. Arizona Door Store helps contractors and homeowners get the door itself right before the first coat goes on, with locally made doors, expert consultants who walk you through the options, and fast local delivery to Scottsdale, Phoenix, and Tucson. Get started with Arizona Door Store and build a project that holds up to the sun.