 how-to
How Do You Replace Old Door Knobs Without Screws?
Last Updated: November 4, 2026
Quick Summary
To replace old door knobs without screws, first check the knob base and rose for a small set screw, then loosen it with a small Allen key or flathead screwdriver and turn counterclockwise until the knob slides off the spindle. Many older and some newer knobs hide their fasteners, so look for a release before forcing anything.
- Check the underside of the knob for a small hole or slot where the set screw sits.
- Use a small Allen key for hex set screws and turn slowly to avoid stripping them.
- Look for a push-button release or thin pin near the rose if no set screw appears.
- Keep the spindle and small latch screws together in a labeled bag during removal.
- Measure door thickness and backset before buying, since standard interior doors are 1-3/8 inches thick.
Table of Contents
- Identify Your Current Door Knob and Lock Type
- Measure Your Door and Hardware Before You Buy
- How to Replace Old Door Knobs Without Screws
- Choosing an Old Style Door Knob Conversion Kit
- How to Replace Antique Door Knobs With Modern Door Knobs
- Troubleshooting Difficult Removals and Post-Installation Checks
- Booking Your Hardware Selection With Arizona Door Store
- Frequently Asked Questions
Identify Your Current Door Knob and Lock Type
Before you buy anything, you need to know what you already have, because most replacement problems start with guessing the wrong lock type. To replace old door knobs successfully, a quick look at the door will tell you most of what you need.
Look at the edge of the door first. A rim lock sits on the face of the door and is visible from the room side. A mortise lock is set into a pocket cut into the edge, so you only see a faceplate. A modern tubular lockset has a round latch and a small round hole in the face.
Mortise locks, rim locks, and modern tubular locksets
- Rim locks: Mounted on the surface, with screws visible on the face. These are often the easiest to swap.
- Mortise locks: Built into the door edge, with a rectangular faceplate. They are common in older homes and need a matching replacement.
- Tubular locksets: Round, with a cylindrical latch and bore hole. Most modern interior doors use this style.
Check the latch backset too. Measure from the edge of the door to the center of the knob spindle. Confirm your door's backset before ordering.
Measure Your Door and Hardware Before You Buy
Measurements prevent the most expensive mistake: a kit that does not fit. A full measurement sheet is worth taking before you shop, since it helps you avoid a return trip. Take every measurement below and write them down before you shop.
- Door thickness: Usually 1-3/8 inches for interior doors and 1-3/4 inches for exterior doors. Measure at the latch edge, not the hinge edge, because paint buildup and swelling can vary.
- Backset: Distance from the door edge to the center of the spindle or bore. Standard backsets are 2-3/8 inches and 2-3/4 inches. Older mortise doors may use a nonstandard backset, so measure rather than assume.
- Bore hole diameter: Often 2-1/8 inches for modern tubular knobs. A smaller 1-1/2 inch bore usually signals an older or specialty lockset.
- Spindle size: Measure the spindle's length and its cross-section (square, hex, or splined). Antique spindles are frequently thinner or shorter than modern replacements, and a mismatched spindle is the most common reason a vintage knob will not seat.
- Plate and rose size: Measure the width and height of the escutcheon or rose, plus the distance between screw holes. If the new plate is smaller, old screw holes may show; if larger, the plate may not sit flat against a recessed door face.
- Latch faceplate: Measure the faceplate height, width, and screw spacing. A mortise lock's faceplate must match the mortise pocket or the door edge will need modification.
- Strike plate: Note the strike plate's dimensions and screw spacing on the jamb so the new latch lines up without chiseling.
Compare each number against the replacement product's specification sheet, not just its marketing description. A common pattern is for a knob to list a 2-3/8 inch backset but ship with a latch that only fits a 2-1/8 inch bore, so confirm both figures.
Watch out: if the new plate is smaller than the old one, you may need to fill and patch old screw holes before installing; plan for that step rather than discovering it mid-install.
Bring your measurement sheet when you call or visit so the team can help match your numbers to the right product.
The table below lists the key measurements to take before you shop, so you can check each one against the product specifications.
| Measurement | Standard value | Note |
|---|---|---|
| Interior door thickness | 1-3/8 inches | Measure at the latch edge |
| Exterior door thickness | 1-3/4 inches | Measure at the latch edge |
| Standard backset | 2-3/8 or 2-3/4 inches | Older mortise doors may differ |
| Modern bore hole | 2-1/8 inches | Smaller 1-1/2 inch bore suggests specialty lockset |
| Antique backset | Nonstandard | Measure rather than assume |
How to Replace Old Door Knobs Without Screws
Many older knobs and some newer designs hide their fasteners. You do not need to force them. In most cases, the knob comes off once you find the hidden release.
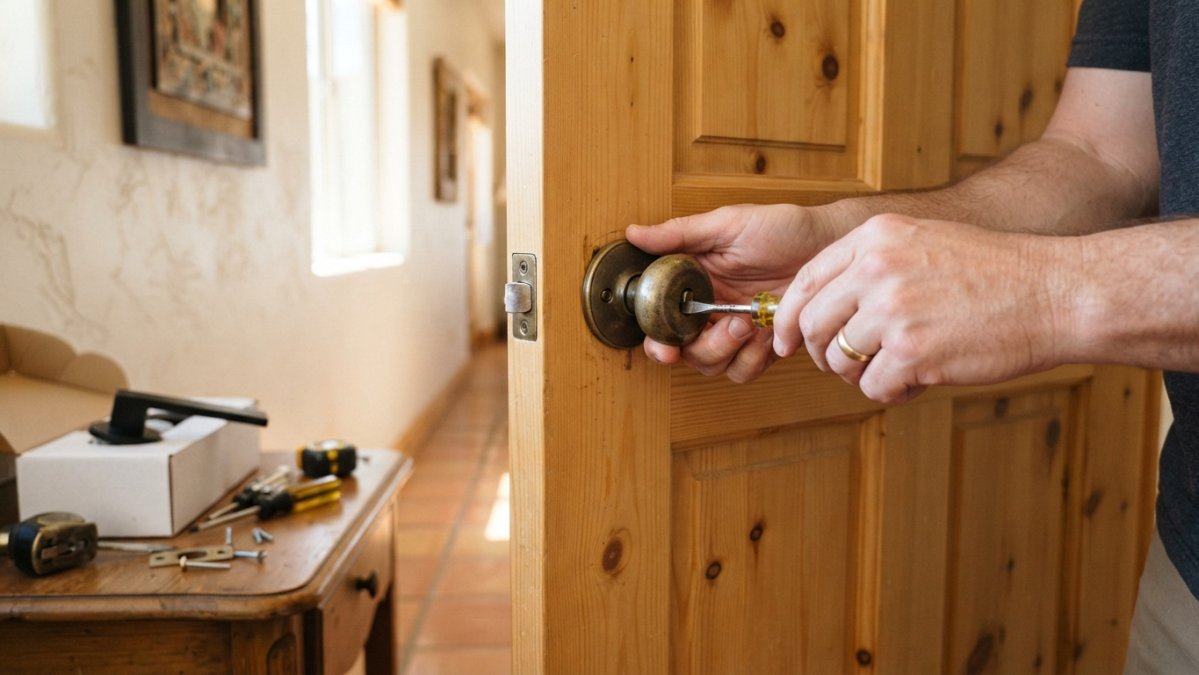
!A homeowner's hands gently working a flathead screwdriver into the small gap around an interior door knob in a bright, sunlit hallway
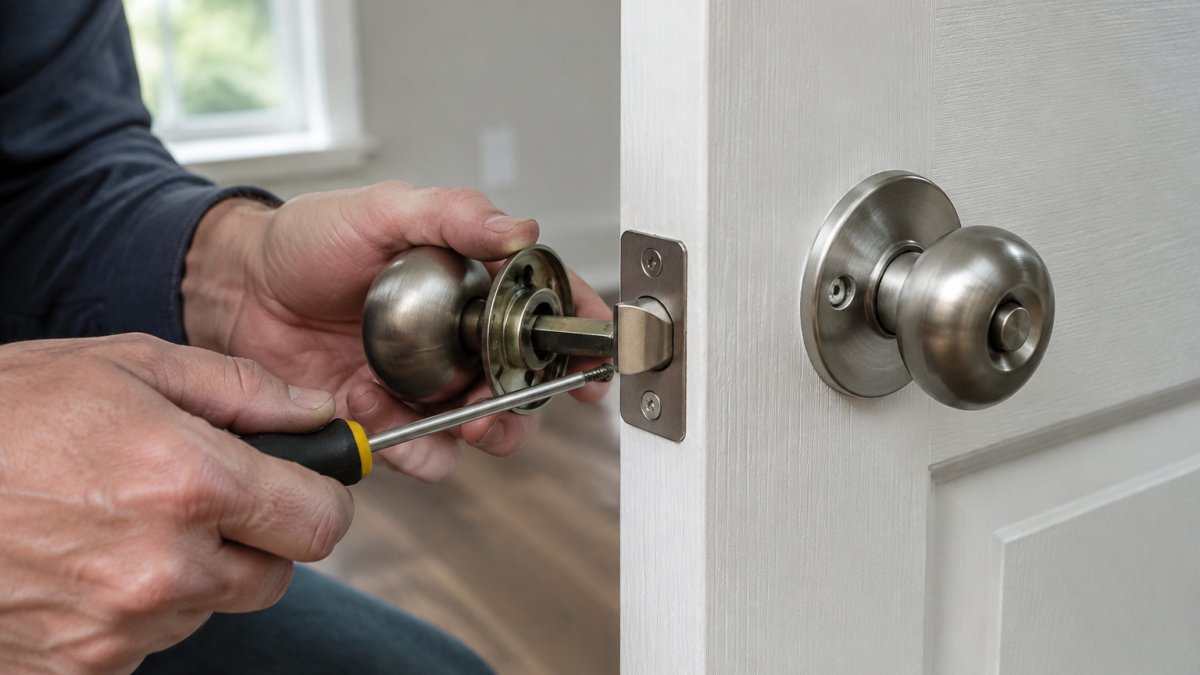
Start by checking the knob base and rose for a small set screw. Look for a tiny hole, often on the underside of the knob near the neck. Use a small Allen key or a flathead screwdriver to loosen it. Turn it counterclockwise until the knob slides off the spindle.
Watch this short demonstration to see the process in action: step-by-step video on removing a hidden-fastener door knob
Finding and loosening a set screw or hidden fastener
- Check the underside of the knob for a small hole or slot.
- Look for a push-button release or a thin pin near the rose.
- Use a small Allen key for hex set screws.
- Turn slowly. Stripped screws make the job much harder.
Removing the spindle and escutcheon plates
Once the knob is off, the spindle usually pulls straight out. Next, remove the escutcheon plates on each side of the door. These are often held by two screws on the inside. If the plates feel stuck, tap gently around the edges with a rubber mallet rather than prying hard.
Keep all the small parts together in a bag. Many people lose the spindle or the latch screws during this step.
Choosing an Old Style Door Knob Conversion Kit
If you want a vintage look with modern function, a conversion kit can help. These kits adapt an older latch to a new knob or lever. They are a good fit for homes where the original mortise lock is still in good shape.
Pick a finish that holds up in your climate. Look for a durable finish that suits your conditions. Check the kit's backset and door thickness against your measurements before you buy.
Hardware finish matters for daily use too.
How to Replace Antique Door Knobs With Modern Door Knobs
Replacing antique knobs is a bigger decision than swapping a basic lockset. Antique hardware often has unusual spindle sizes and backsets, so a standard modern knob may not line up.
Start by deciding whether you want to keep the original look or update the function. Many homeowners keep the old door and swap only the hardware. Others replace the whole mortise lock with a modern tubular set.
Preserving original hardware and historic doors
If you want to keep the historic character, save the original knobs and plates before you remove them. Store them in labeled bags. You can clean brass with a mild solution and a soft cloth. Avoid harsh chemicals that strip the patina.
Old doors can also split or warp. If the door face is damaged, repair it before installing new hardware so the latch lines up cleanly. A little patient work protects both the door and its value.
Troubleshooting Difficult Removals and Post-Installation Checks
Sometimes a knob will not budge, and forcing it is how doors get damaged. Work through the specific failure modes below before reaching for a pry bar.
Seized or stripped set screws
A set screw that has not moved in decades can seize in its threads. Use a driver that fits the slot exactly. If the head is stripped, try a rubber band between the driver and screw for extra grip, or cut a new slot with a rotary tool as a last resort. Watch out: an oversized driver rounds the screw head further, so match the bit to the slot before applying force.
Paint-bound plates and roses
Layers of paint can glue an escutcheon or rose to the door. Score the paint line around the plate with a utility knife before prying, then tap gently around the edge with a rubber mallet. A thin putty knife worked under the edge is safer than a screwdriver, which can gouge the door face.
Hidden clips and push-button releases
Some modern knobs use a spring clip or push-button release instead of a set screw. Look for a small slot on the rose or a pinhole on the knob neck. Insert a paper clip or small pin to depress the release while pulling the knob straight off. If the knob turns but will not pull free, the clip is likely still engaged.
Stuck spindles and latch mechanisms
A spindle that will not pull out may be rusted or burred. If the latch itself is stuck, remove the faceplate screws and lift the latch out before forcing the knob.
Post-installation checks
After installation, test the door several times. Make sure the latch springs back fully and the strike plate lines up. If the door rubs or the latch sticks, the strike plate may need a small adjustment with a file or chisel. Once the latch and strike plate work smoothly, the same careful alignment matters when you install smart deadbolt hardware without drilling.
Check these items before you call it finished:
- The knob turns smoothly without binding.
- The latch retracts and extends fully.
- The door closes without rubbing the frame.
- All screws are snug but not overtightened.
- The spindle is centered and the knob does not wobble.
If a knob still will not come free after these steps, stop before damaging the door and consult a hardware specialist who can identify the specific fastener type.
Booking Your Hardware Selection With Arizona Door Store
Choosing the right replacement is easier when you have expert help. Arizona Door Store can guide you through lock types, measurements, and finishes. Pricing depends on the product, quantity, and delivery, so visit the Arizona Door Store website or contact the team for a current quote.
Frequently Asked Questions
Can you replace door knobs on old doors?
Yes. Most older interior doors accept modern replacement knobs, but the bore size, backset, and door thickness must match the new hardware. Measure the existing hole before buying. The most common backset is 2-3/8 inches, and the common bore is 2-1/8 inches. Old doors can be slightly warped or out of square, so check that the latch slides in smoothly after installation. Adjust the strike plate if needed. Pricing depends on the style, finish, and quantity, so request a current quote on the website.
How do you remove a door knob that has no visible screws?
Look for a small set screw hidden in the base of the knob, often under a decorative rosette or in a tiny hole on the neck. Insert an Allen wrench or small screwdriver, turn it counterclockwise, and the knob should slide off. If you cannot find one, check the rose or escutcheon for a spring-loaded release, or try gently pulling the knob straight out while pressing a release button. Avoid forcing it, which can damage the spindle or the door face.
Can I install a modern door knob on an antique door?
Usually yes, but the fit has to be verified first. Antique doors often have larger or oddly placed bores, thicker wood, and mortise locks that differ from modern tubular locksets. A conversion kit or a modern lockset with an adapter plate can bridge the gap. Preserve original hardware by storing it safely if you may want to restore the door later. If the door is historically significant, consider a sympathetic style that matches the period.
What tools do I need to replace an old door knob?
Most jobs need a Phillips and flathead screwdriver, an Allen wrench set, a tape measure, a pencil, a drill with bits if you need to enlarge a bore, and a utility knife for paint lines. Have a small container for screws and a towel to protect the door face. Plan on about one to two hours for a standard interior door, longer if the lock is a mortise type or the door needs adjustment.