 ultimate-guide
Durable Moulding for Home Renovation: 2026 Guide
Table of Contents
- How to Choose Durable Moulding for Home Renovation
- MDF vs Solid Wood Moulding Durability
- Best Moulding Materials for High Traffic Areas
- Matching Moulding Profiles to Your Home's Architecture
- Moulding Maintenance and Repair Tips
- Measuring, Installation, and Hardware Essentials
- Conclusion
- Frequently Asked Questions
Last Updated: September 13, 2026
How to Choose Durable Moulding for Home Renovation
Choosing durable moulding for home renovation comes down to three factors: the material's moisture resistance, where the trim will be installed, and how well its profile matches your home's architecture. Get those right and your trim will hold its lines for decades instead of swelling, cracking, or peeling within a few seasons.
This guide covers materials that hold up in desert heat and monsoon humidity, profiles for different architectural styles, and repair techniques that extend trim life.
Durable moulding is trim material engineered to resist warping, moisture damage, and physical impact while maintaining its profile and finish over time.
Most buying guides treat trim as purely aesthetic. That's the mistake: material choice determines whether you're repainting baseboard in three years or fifteen.
MDF vs Solid Wood Moulding Durability
MDF moulding offers superior dimensional stability in dry, climate-controlled interiors, while solid wood wins in any space exposed to moisture or heavy impact. The choice depends on where the trim goes, not on which material is objectively "better."
Medium-density fiberboard is an engineered product made from wood fibers bonded with resin and pressed into dense panels. It machines cleanly, takes paint exceptionally well, and costs less than solid wood. Because it's uniform with no grain direction, MDF resists the expansion and contraction that opens miter joints in solid wood.
Solid wood, by contrast, moves with the seasons, manageable in a stable interior, but a liability near bathrooms, exterior doors, or any space with fluctuating humidity.
How Moisture and Humidity Affect Each Material
Moisture is where MDF's advantages reverse. When MDF absorbs water, the fibers swell and never return to their original dimensions; a swollen MDF baseboard crumbles at the edges and cannot be sanded back into shape.
Solid wood swells and shrinks too, but it recovers. The trade-off is joint movement: miters open and close seasonally, which is why finish carpenters glue and pin outside corners rather than relying on the cut alone.
For kitchens, bathrooms, laundry rooms, and anywhere plumbing can leak, skip MDF entirely. For bedrooms, hallways, and formal living spaces with controlled humidity, MDF's stability and paint finish are hard to beat.
Best Moulding Materials for High Traffic Areas
PVC, polyurethane, and hardwood are the three materials that survive high-traffic zones, and each wins in a different situation: PVC takes moisture and abuse, polyurethane takes detail and paint, hardwood takes impact and refinishing.
Side by side, the difference is obvious: PVC trim feels denser and slightly flexible, polyurethane is lighter with crisper detail on ornate profiles, and hardwood has visible grain and real weight.
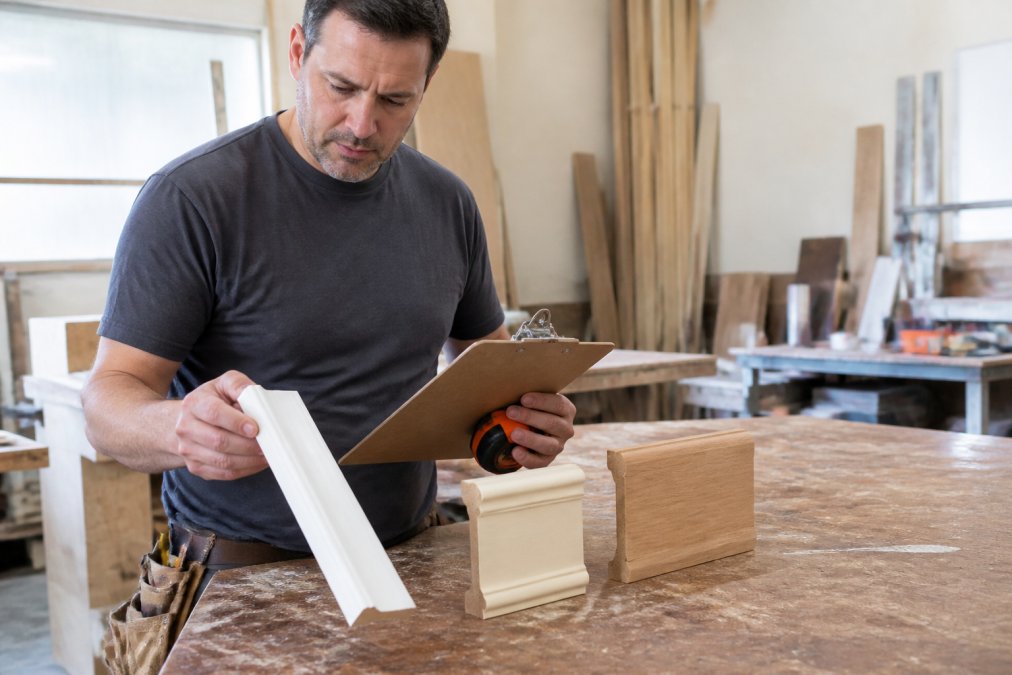
PVC, Polyurethane, and Hardwood Compared
| Material | Moisture Resistance | Impact Resistance | Best For | Refinishable |
|---|---|---|---|---|
| PVC trim | Excellent | Good | Bathrooms, mudrooms, exteriors | No (paint only) |
| Polyurethane | Good | Fair | Ornate profiles, painted interiors | No (paint only) |
| Hardwood | Fair | Excellent | Hallways, stairs, stain-grade work | Yes |
PVC trim is the clear winner for wet rooms and any trim that meets the floor. It will not rot and holds paint well after proper surface prep. The drawback: PVC expands and contracts more than wood with temperature swings, so it needs slightly looser joints and flexible caulk.
Polyurethane shines on decorative profiles where crisp detail matters: crown moulding, panel moulding, and casing with deep curves. It's lighter than wood, which makes overhead crown installation easier. Where it falls short is impact: a polyurethane baseboard dents where hardwood would shrug off the same hit.
Hardwood, including red oak and white oak, is the standard for stain-grade work and any trim that takes a beating. It dents less, refinishes repeatedly, and holds up in high-traffic areas like stair stringers and hallway baseboard.
Matching Moulding Profiles to Your Home's Architecture
Profile selection should start with your home's architectural style, not with what's on sale. Trim that's too ornate for a midcentury ranch or too plain for a Victorian reads as wrong even to people who can't name why. The harder problem, which most guides skip, is matching durable modern materials to the historical profiles of an older home without turning the renovation into a museum restoration.
A Visual Decision Framework
Work through these in order; each answer narrows the profile choices before you look at a catalog.
- Identify the era and style. Craftsman homes favor flat, rectilinear casings with a slight taper and a squared plinth block at the floor. Colonial homes suit simple, symmetrical profiles with a modest reveal. Victorian and Tudor homes carry heavier, layered trim with deeper projection. Midcentury ranches want flat, minimal casing, often with no crown at all.
- Match projection to ceiling height. Crown moulding projection should scale with the room. With 8-foot ceilings or lower, keep crown modest, roughly 3 to 4 inches of face, or it crowds the space. Rooms with 9- to 10-foot ceilings can carry 5- to 6-inch crown; above 10 feet, deeper crown and wider baseboard read as intentional rather than heavy.
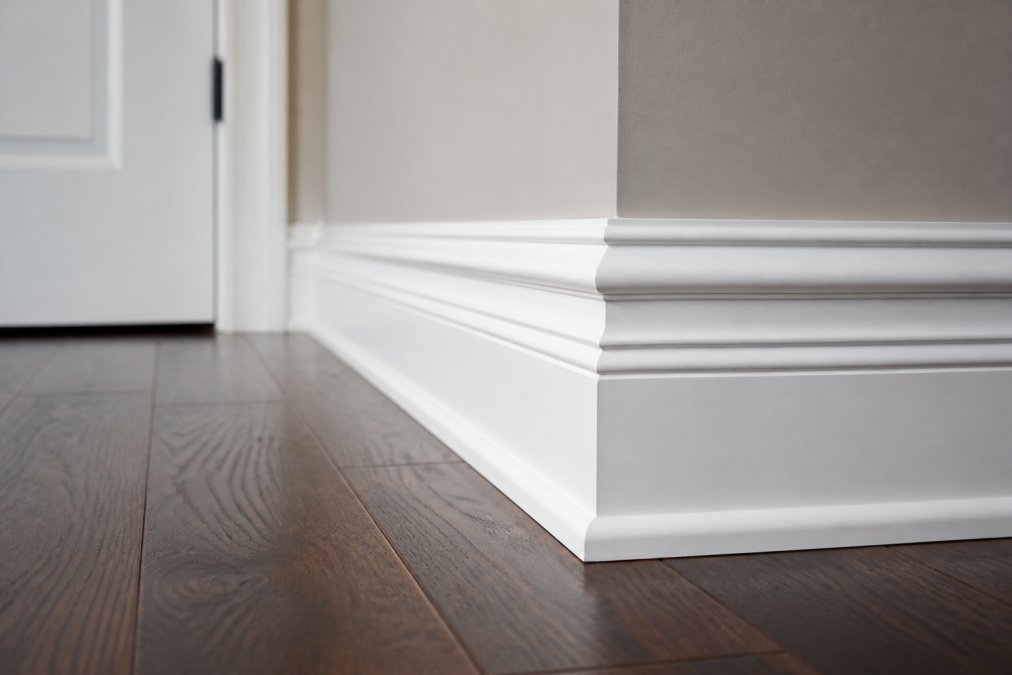
- Scale baseboard to wall height. A common rule of thumb: baseboard height should be roughly 1/12 to 1/10 of wall height (thisoldhouse.com). An 8-foot wall takes a 5- to 6-inch baseboard; a 10-foot wall takes 7 to 8 inches. Taller baseboard also hides more wall-to-floor imperfection, which matters in older homes.
- Repeat the casing profile throughout. Consistency between door casing, window casing, and baseboard ties a renovation together. If you change profiles mid-house, do it at a natural break, a hallway, a doorway, a floor transition, not mid-wall.
- Check the profile against existing trim. In a partial renovation, bring a sample of the original trim to match depth and reveal. Profile depth is the dimension most often mismatched, and the one that reads as wrong from across the room.
Matching Modern Materials to Historical Profiles
This is where durability and historical accuracy collide. You can get a historically accurate profile in a durable modern material, you just have to know which material to use where.
For painted historical trim (most pre-1930 homes), polyurethane is often the best match. It machines to crisp detail, reproduces ornate profiles accurately, and takes paint the way original plaster-and-wood trim did. The trade-off is impact resistance: polyurethane dents where original hardwood would have shrugged off the hit. In high-traffic hallways, consider hardwood for the baseboard run and polyurethane for casing and crown, where detail matters more than impact.
For stain-grade historical trim, hardwood is the only honest match. Red oak and white oak are the standard species and can be milled to match original profiles by a millwork supplier. If the original profile is unavailable off the shelf, a supplier can often run a custom knife to match, worth the cost on a visible run in a historic home.
For wet areas in older homes, PVC is the pragmatic choice even though it isn't historically accurate. Bathrooms and laundry rooms in older homes rarely have original trim worth preserving, and PVC's moisture resistance prevents the rot that destroys wood trim. Paint it to match the surrounding trim and the material difference disappears.
For MDF in older homes, use it only in dry, climate-controlled rooms where the original trim was already painted and simple. MDF cannot reproduce deep ornate profiles as crisply as polyurethane, and it fails badly near moisture.
Working With Uneven Walls and Floors
Older homes rarely have plumb walls or level floors, and the profile choice matters less than the installation approach. A few practical adjustments:
- Scribe baseboard to the floor rather than cutting it square and caulking the gap. A scribed baseboard sits tight against an uneven floor and looks intentional; a caulked gap looks like a mistake.
- Use flexible caulk at the wall-to-trim joint to absorb the small gaps that come with uneven plaster or drywall.
- Cope inside corners rather than mitering them. Coped joints stay tight as the material moves seasonally, which matters more in older homes with wider humidity swings.
- Add a plinth block at door casings if the original trim had one. Plinth blocks hide the joint between baseboard and casing and are period-correct for many older styles.
Arizona Door Store stocks moulding profiles, and the team can help match a profile to an existing home's trim before you commit to a full run.
Moulding Maintenance and Repair Tips
Most trim damage is repairable without replacement, and knowing the repair method for your material separates trim that lasts thirty years from trim that gets torn out at the first dent. Here's what actually works, material by material.
Material-Specific Repair Methods
MDF. MDF does not accept standard wood filler well because the filler shrinks differently than the fiberboard. Use a lightweight spackle or MDF-specific patching compound, apply in thin layers, and sand with 220-grit. For swollen edges, the classic MDF failure, you cannot sand the swelling out. Cut back to sound material with a multi-tool, let it dry fully, then splice in a new piece with a scarf joint glued and pinned. If the swelling came from slab moisture, fix the source first or the repair will fail the same way.
Solid wood. Dents in hardwood can often be raised without filler. Place a damp cloth over the dent and run a clothes iron on medium over it; the steam swells the crushed fibers back. This works on bare or finished wood and saves a refinishing job. For deeper gouges, use a tinted wood filler matched to the species, then sand flush and touch up the finish. Red oak and white oak take stain and filler predictably; softer species like pine dent more easily and blend poorly.
PVC. PVC does not absorb filler the way wood does. Use a PVC-compatible patching compound or, for small holes, a two-part epoxy filler. Sand with 220-grit, wipe with a PVC cleaner, and prime with a bonding primer before painting. PVC also expands and contracts more than wood, so caulk joints with a flexible, paintable caulk, rigid caulk cracks within a season.
Polyurethane. Polyurethane is the easiest to repair cosmetically and the hardest to repair structurally. Small dents and nail holes take lightweight spackle or glazing putty. But polyurethane cracks rather than dents under impact, and a cracked casing usually needs the affected run replaced rather than patched, because the crack telegraphs through paint.
Refinishing Painted vs. Stain-Grade Trim
Refinishing painted trim starts with cleaning, not sanding. Grease, dust, and old caulk residue prevent new paint from bonding, so a degreaser and a scuff sand with 120- to 150-grit come first. Fill dents and nail holes, caulk joints with paintable caulk, then spot-prime bare wood and filler before the finish coat. Skipping the spot prime is the most common reason touch-ups flash through the topcoat.
Stain-grade hardwood refinishing is a bigger job and worth doing right because it's the one durability advantage no synthetic material offers, hardwood trim can be refinished several times over its life. The sequence: strip or sand back the old finish evenly (a chemical stripper preserves detail on profiled edges better than sanding), neutralize the stripper, sand through progressively finer grits, apply stain, then a protective topcoat. Oil-based polyurethane and waterborne finishes both work; waterborne dries faster and stays clearer, oil-based amberizes over time. Match the sheen to the surrounding trim, a satin patch on semi-gloss trim reads as a repair from across the room.
A Long-Term Care Schedule
Routine maintenance is minimal but matters more than most homeowners expect:
- Annually: Check caulk lines at tubs, showers, exterior doors, and any trim meeting a slab. Replace cracked caulk before water gets behind it, the single highest-value habit.
- Every 2-3 years: Touch up paint on the bottom edge of baseboard, where mops, vacuum cleaners, and pet traffic do the most damage. A thin bead of paint there is cheaper than replacing the run.
- As noticed: Re-pin loose trim promptly. A small gap lets moisture in and accelerates the problem, especially on MDF.
- After any plumbing event: Inspect adjacent baseboard and casing within 48 hours. MDF wicks moisture fast and damage is often invisible until the edge crumbles.
For homeowners in older houses, the repair decision often comes down to matching existing trim. If the original profile is still available, replace the damaged run; if it isn't, a scarf joint with a matching profile from a millwork supplier is usually cleaner than patching a large damaged area. Arizona Door Store stocks moulding and the patching, caulking, and finishing supplies that go with it.
Measuring, Installation, and Hardware Essentials
Accurate measurement and the right fasteners prevent most installation failures. Measure twice at the wall, not on the floor, because floors are rarely level and walls rarely plumb.
What you'll need for a basic trim installation:
- Tape measure and a pencil
- Miter saw with a sharp finish blade
- Coping saw for inside corners
- Finish nailer and 4d to 6d finish nails
- Construction adhesive for baseboard and crown
- Caulk and paintable wood filler
- Stud finder
For measuring, work one wall at a time and mark cut lengths against the actual wall. For baseboard, cope inside corners rather than mitering; coped joints stay tight as the material moves. Outside corners should be mitered, glued, and pinned.
Installation sequence matters. Run baseboard before casing in a full renovation, and install crown before painting the ceiling if the ceiling also needs work. Always acclimate trim to the room for a few days before cutting, especially solid wood.
Arizona Door Store stocks moulding, hardware, and the finish carpentry supplies that go with it.
Conclusion
Getting durable moulding right means matching material to location, profile to architecture, and installation method to the realities of your walls and floors. Get those three aligned and the trim will outlast the paint on it.
Arizona Door Store carries moulding, hardware, and shelving with the guidance to match the right product to each space, backed by fast will-call service and reliable local delivery. Our team helps contractors and homeowners sort through material and profile choices without pushing the most expensive option.
Frequently Asked Questions
What is the most durable material for interior moulding?
For interior spaces, solid hardwood like red oak or white oak offers the best durability rating, resisting dents and moisture better than MDF. In high-traffic areas, PVC trim or polyurethane moulding can outperform wood because they handle impacts and humidity without swelling. The right choice depends on your room's moisture levels and how much wear the trim will face. Durable moulding balances material strength with proper installation and finish.
Is MDF or solid wood better for high-traffic areas?
Solid wood holds up better in high-traffic areas because it resists dents and can be sanded and refinished. MDF has a smooth paint-grade surface and costs less, but its edges crumble when hit and it swells if moisture gets in. For hallways, stairways, and commercial-style rooms, choose hardwood or a synthetic composite like PVC. If you use MDF, keep it in dry, low-impact rooms and seal all edges carefully.
How do I maintain and repair moulding to make it last longer?
Dust moulding monthly and wipe it with a damp cloth to prevent buildup. Check caulking around baseboards and casing yearly; re-caulk any gaps to keep moisture out. For small dents in wood, use wood filler, sand smooth, and touch up the paint. Deep scratches on stain-grade trim may need a matching stain pen. Repaint or refinish every 5-7 years, or sooner in high-traffic areas, to protect the material and keep it looking sharp.
What moulding profile works best for a traditional home style?
Traditional homes usually suit wider, more ornate profiles like crown moulding with a deeper projection and layered baseboards. Colonial and Victorian styles favor detailed casing and panel moulding. For a modern look, choose clean, flat profiles with minimal projection. The key is matching the trim's scale to your room height and existing architectural style. Bring photos of your space to a supplier so they can help you compare profiles side by side.