 how-to
Design Custom Closet Shelving for Small Spaces
Table of Contents
- Measure Your Closet and Plan the Layout
- Small Closet Shelving Ideas That Work
- Reach-In Closet (5 to 6 Feet Wide, 24 Inches Deep)
- Narrow Walk-In (4 to 5 Feet Wide, 5 to 6 Feet Deep)
- Deep Closet with a Single Door (36 to 48 Inches Wide, 30 to 36 Inches Deep)
- Awkward Shapes: Sloped Ceilings, Angles, and Obstructions
- Vertical Storage Strategies That Apply to Every Shape
- Combining Hanging and Shelving Zones
- Determine Closet Shelf Dimensions for Your Space
- Build a DIY Small Closet Organizer
- Choose Materials and Storage Solutions
- Organize Shoes, Accessories, and Clothing
- Declutter Before You Install
- Frequently Asked Questions
Last Updated: October 17, 2026
Measure Your Closet and Plan the Layout
The first step in designing custom closet shelving for small spaces is getting accurate measurements. A small closet leaves no room for guesswork, every inch counts.
Get Accurate Measurements
Measure width, depth, and height with a tape measure. Record three measurements for width (top, middle, bottom) since walls are often uneven, and do the same for depth and height at the left, center, and right sides.
Note outlets, vents, or pipes, and mark areas that jut out or slope inward. Photograph the closet from multiple angles. Write down the measurements and double-check each one, since mistakes ripple through the entire project.
Assess Wall Condition and Load-Bearing Capacity
Not all walls hold weight equally. Drywall alone cannot support heavy shelves, so you need studs behind them for serious load capacity. Locate studs with a stud finder (typically 16 inches apart) and mark them with a pencil.
Older homes may have plaster over lath instead of drywall. Plaster is harder but more brittle, so anchor into studs rather than drilling through it.
Small Closet Shelving Ideas That Work
Small closets demand smart thinking, but the right layout depends on your closet's shape. A reach-in closet with bifold doors needs a different plan than a narrow walk-in or a deep closet with a single door. Below are layouts matched to common small-closet footprints, so you can pick the one that fits your space instead of forcing a generic plan.
Reach-In Closet (5 to 6 Feet Wide, 24 Inches Deep)
This is the most common small closet. The back wall is your primary storage surface, and the side walls are often wasted.
- Back wall: Install a 12-inch-deep shelf at 70 inches high running the full width. Below it, place a hanging rod at 60 to 65 inches for shirts and shorter garments.
- Side walls: Add 10-inch-deep shelves on one or both side walls for shoes, bins, or folded items. These shelves can run from 30 to 70 inches high, giving you four to five shelves in a space most people leave empty.
- Floor: Keep a 12-inch-wide strip clear for a shoe rack or a low drawer unit.
Narrow Walk-In (4 to 5 Feet Wide, 5 to 6 Feet Deep)
A narrow walk-in gives you two long side walls and a short back wall. Lining both sides with deep shelves leaves no room to stand.
- One side: Full-height shelving, 12 inches deep, spaced 10 to 12 inches apart. This becomes your primary storage wall.
- Other side: A single hanging rod at 60 to 65 inches with a shelf above at 70 inches. Keep this side shallow (12 inches) so you have a 24-inch walking aisle.
- Back wall: A shallow 8- to 10-inch shelf at 70 inches for overflow bins.
Assign one side to folded and bin storage and the other to hanging to keep the aisle clear.
Deep Closet with a Single Door (36 to 48 Inches Wide, 30 to 36 Inches Deep)
Deep closets waste the back half because you cannot reach it. Treat the closet as two zones: a front accessible zone and a back long-term zone.
- Front zone (first 18 inches): Hanging rod at 60 to 65 inches and a 12-inch shelf above at 70 inches. This is what you reach daily.
- Back zone (remaining depth): Full-height shelves 12 inches deep for off-season clothing, luggage, or bins you access a few times a year. Leave a 24-inch gap between the front hanging rod and the back shelves so you can step in.
- Door wall: Mount a shallow 6- to 8-inch shelf or over-the-door organizer for accessories.
Awkward Shapes: Sloped Ceilings, Angles, and Obstructions
Older homes often have sloped ceilings, chimney chases, or angled walls.
- Sloped ceiling: Put the tallest shelving on the high side. On the low side, use a single low shelf at 30 inches or a hanging rod for short items only.
- Angled wall: Corner shelves (quarter-circle or triangular) reclaim the dead corner. A 12-inch corner shelf at three heights holds bins or shoes without blocking the main wall.
- Obstructions (vents, pipes, outlets): Measure and mark them before you plan. Build shelves around them rather than notching after installation. A 2-inch clearance around a vent keeps airflow open.
Vertical Storage Strategies That Apply to Every Shape
Regardless of footprint:
- Start at eye level. Your first shelf at 60 to 65 inches is the most-used surface. Space additional shelves 10 to 12 inches apart above and below.
- Use the space above the rod. A shelf at 70 inches or higher holds hats, bags, and off-season items that do not need daily access.
- Keep shelf depth matched to the wall. Back walls can take 12-inch shelves; side walls often work better at 10 inches so they do not crowd the aisle.
Combining Hanging and Shelving Zones
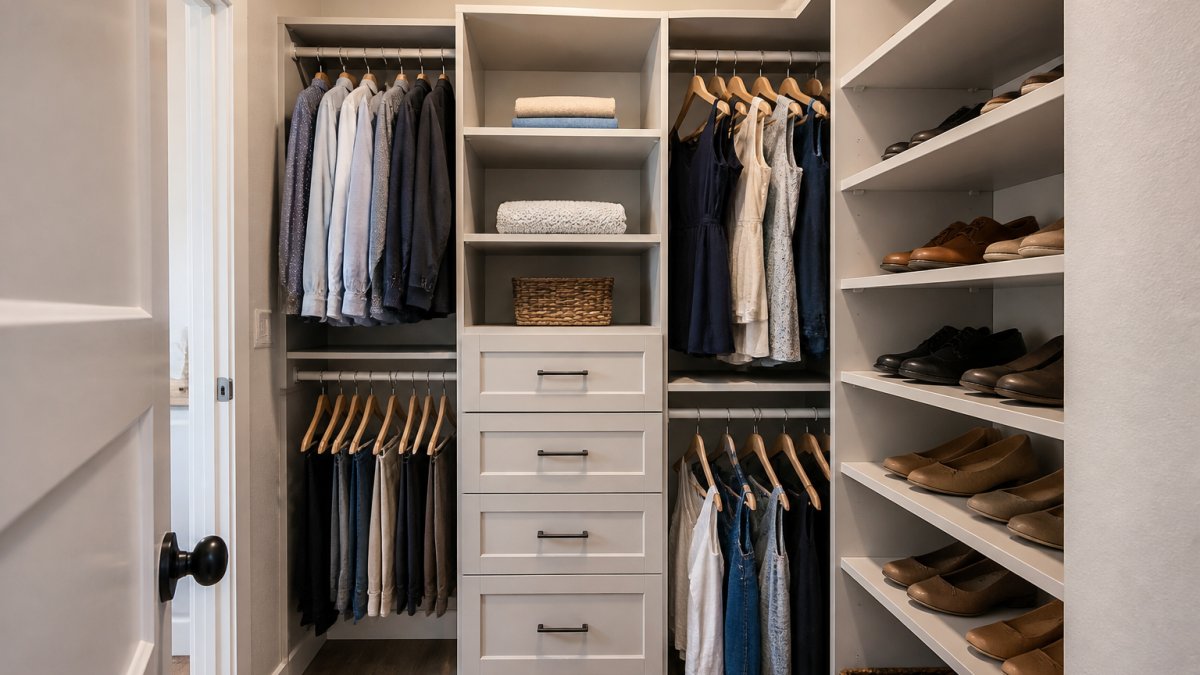
Divide your closet into zones by function, not by wall: one side for hanging (longer items like dresses or coats), the other for shelves holding folded items, shoes, and accessories. You can also stack shelves above hanging space, with rods at 60 to 65 inches and shelves at 70 inches or higher.
Determine Closet Shelf Dimensions for Your Space
Wrong shelf dimensions create wasted space or overloaded shelves.
Shelf Depth and Width Standards
Most closet shelves run 12 inches deep, enough for folded clothes, shoes, and small bins without making the back unreachable.
Standard shelves run 24 to 36 inches wide. Longer shelves (48+ inches) need mid-span support or they'll sag, so stick with 24 to 36 inches for small closets. Measure twice, cut once.
Spacing Between Shelves
Spacing depends on what you store: folded sweaters need 10 to 12 inches, stacked bins 14 to 16 inches, shoes 8 to 10 inches. Measure your tallest folded item, add 2 inches of clearance, and build spacing around your largest items first.
| Item Type | Minimum Spacing |
|---|---|
| Folded sweaters | 10-12 inches |
| Stacked bins | 14-16 inches |
| Shoes on shelves | 8-10 inches |
| Handbags or hats | 8-10 inches |
| Off-season storage | 12-14 inches |
Build a DIY Small Closet Organizer
Building custom closet shelving yourself saves money and lets you customize everything to your exact needs.
Materials and Tools You'll Need
For basic shelving, gather these materials:
- Wooden boards (pine or plywood work well)
- Wall brackets rated for your expected load
- Screws (2.5 inches for studs)
Tools you'll need:
- Drill with bits
- Level (2 feet or longer)
- Tape measure
Rent or borrow what you don't own. Most hardware stores rent tools cheaply.
Installation Steps
Follow this process for reliable results:
-
Mark stud locations using your stud finder. Draw vertical lines with a pencil where studs sit.
-
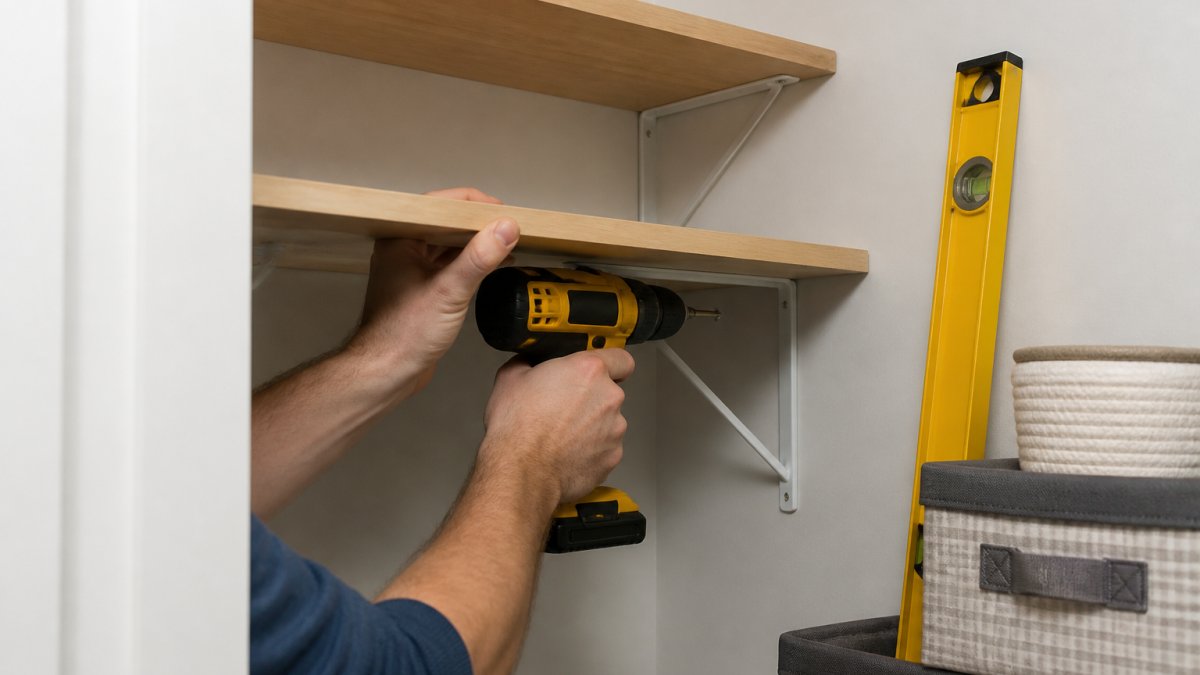
Plan your bracket placement. Brackets go into studs. Mark where each bracket will mount. Space them 24 to 32 inches apart for stability.
-
Install brackets. Drill pilot holes first. Then drive screws into studs. Use 2.5-inch screws for solid hold.
-
Check level. Place your level on each bracket. Adjust until perfectly level. Crooked brackets cause shelves to sag.
-
Lay the shelf board. Set it on the brackets. Check level again in both directions.
-
Secure the shelf. Screw the shelf down to each bracket from underneath. This prevents the shelf from lifting.
-
Repeat for each shelf. Work from bottom to top. This keeps you safe and stable.
Common Installation Mistakes to Avoid
Uneven brackets ruin everything, so check level before moving on. Space brackets no more than 32 inches apart (closer for heavy loads) to prevent sag. If you're not drilling into studs, use toggle bolts or heavy-duty anchors rated for your shelf weight rather than plastic anchors. Know your bracket's rating and stay under it.
Choose Materials and Storage Solutions
Material choices affect how long your shelves last and how they look.
Wood vs. Wire Shelving
Solid wood shelves look better, hold more weight, and suit visible or bedroom closets. Wire shelves are cheaper and lighter, let air flow to help prevent mold, and work well for dark or storage-only spaces, though they show dust. For small spaces, solid wood looks more finished and collects less dust.
Shelving Kits and Modular Components
Pre-made shelving kits save time, coming with brackets, shelves, and hardware, and work well if your closet matches standard sizes. Modular systems use clips or pegs to adjust shelf heights without tools as your needs shift. Kits cost less, but custom shelving fits perfectly, which is often worth the extra effort in very small closets.
Organize Shoes, Accessories, and Clothing
Storage containers make or break a small closet. Good containers stack neatly and keep items visible.
Storage Containers and Bins
Clear plastic bins let you see contents without opening them; label each one. Fabric bins look nicer on open shelves and suit accessories or off-season clothes. Shoe racks fit under shelves or on the floor, over-the-door racks save shelf space, and hanging organizers with pockets hold socks or belts. Stack bins neatly so everything has a place.
Maximizing Floor Space
The closet floor is prime real estate. A shoe rack or shelf unit holds 12 to 20 pairs depending on size, and a small drawer unit for socks, belts, or underwear stacks well in tight spaces. Keep the floor clear of clutter so the closet doesn't feel cramped.
Declutter Before You Install
Installing shelves before decluttering wastes effort. Sort everything and keep only what you wear; if you haven't worn it in a year, it goes.
Designing custom closet shelving for small spaces takes planning, but the payoff is huge. A well-organized closet saves time every morning and reduces stress. Start with accurate measurements.
At Arizona Door Store, we understand that small spaces demand smart solutions. We stock high-quality shelving materials, hardware, and organizational components to help you maximize every inch. Whether you're a homeowner tackling this yourself or a contractor managing a renovation, we're here to support your project with expert advice and reliable local service. Visit your local design center or contact our team for personalized recommendations on materials and installation techniques that work best for your specific closet dimensions.
Frequently Asked Questions
How do you measure a closet before adding shelves?
Start by measuring the width, depth, and height of your closet using a tape measure. Record the distance from floor to ceiling at multiple points, as older homes often have uneven walls. Measure the width at the top, middle, and bottom to account for walls that aren't perfectly plumb. Note any obstacles like outlets, pipes, or trim. Take photos and sketch a simple diagram to reference during the design phase. Accurate measurements prevent costly mistakes and ensure your custom closet shelving fits properly.
What are the best closet shelf dimensions for small spaces?
For small closets, shelves should typically be 12-16 inches deep to balance usable space with stability. Width depends on your closet shape, but 24-36 inches is standard for reach-in closets. Space shelves 12-18 inches apart vertically to accommodate most items without wasting space. Shallower shelves (12 inches) work well for shoes and accessories, while deeper shelves (16 inches) handle folded clothing. Avoid shelves wider than 48 inches without center support, as they sag under weight. Adjust dimensions based on what you'll actually store.
Can you build a small closet organizer yourself?
Yes, DIY small closet organizers are achievable for homeowners with basic tools and carpentry skills. You'll need a drill, level, saw, and stud finder. Wall anchors or studs provide the foundation for safe installation. Wood shelving is easier to cut and install than wire systems. Start with one shelf to test fit and alignment before installing the full system. If your walls are uneven or you're uncertain about load capacity, consult a professional or reach out to a local supplier for guidance on wall conditions and material selection.
How can you maximize vertical space in a small closet?
Use the full height of your closet by stacking shelves above existing hanging rods or installing shelves all the way to the ceiling. Install open shelving on side walls to capture otherwise unused space. Stack storage containers vertically to organize shoes, accessories, and seasonal items. Add shelves above the door frame for lightweight items. Remove the closet rod entirely if you fold most clothing and install shelves floor-to-ceiling. Vertical space is your best tool for small closets, so prioritize height over floor footprint in your custom closet shelving design.